How to Draw an Electrical Plan With RoomSketcher
Drawing an electrical plan is an essential step in ensuring a safe and efficient electrical system for your space. Fortunately, with the help of modern tools like RoomSketcher, creating a detailed and accurate electrical plan has never been easier.
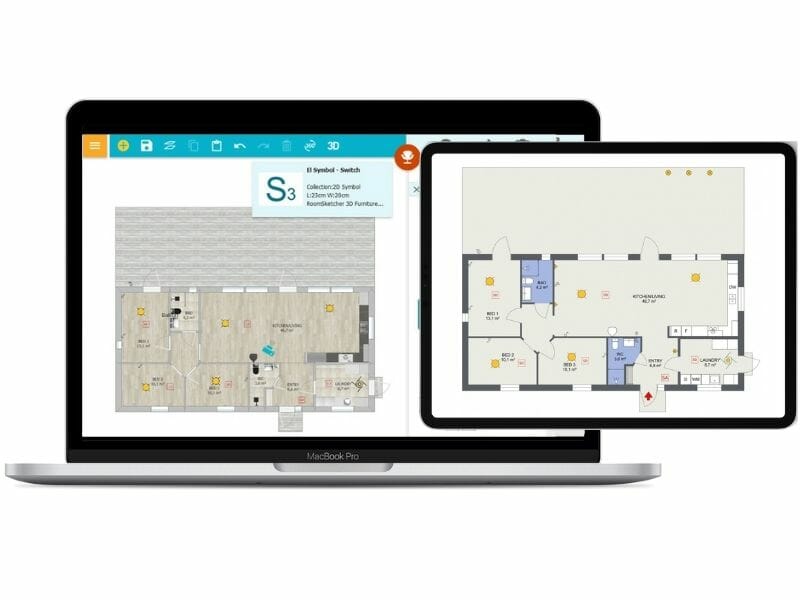
We'll guide you through the process of drawing an electrical plan using RoomSketcher, a user-friendly software that allows you to draw professional electrical floor plans.
Whether you're an experienced professional or a DIY enthusiast, this article will provide you with the knowledge and skills to create a comprehensive electrical plan that meets all your electrical needs.
What Is an Electrical Plan?
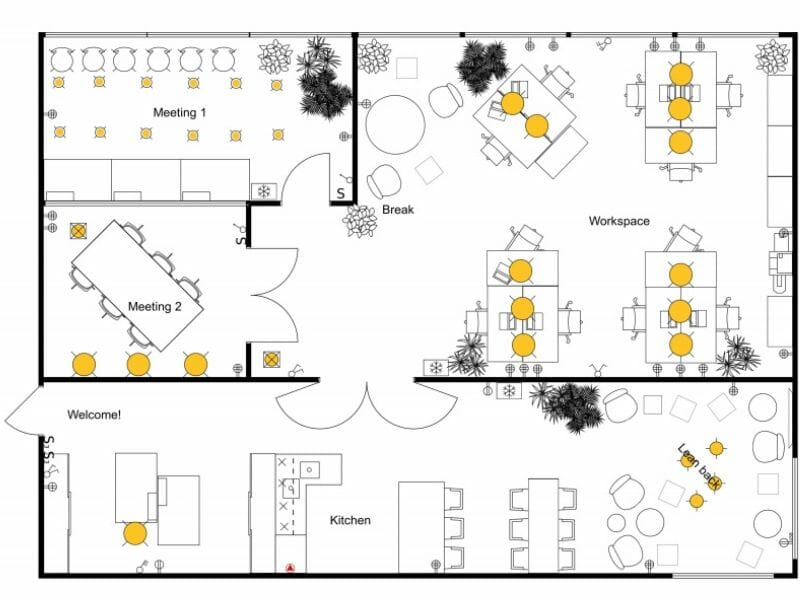
An electrical plan (sometimes called an electrical drawing or wiring diagram) is a detailed and scaled diagram that illustrates the layout and placement of electrical components, fixtures, outlets, switches, and wiring within a building or space.
It clearly represents the electrical system, enabling electricians, contractors, and homeowners to understand and implement the necessary wiring and connections for optimal functionality and safety. An electrical plan serves as a blueprint for electrical installations, ensuring that power distribution and lighting systems are properly designed and coordinated with the overall building layout.
Purposes and Benefits of Electrical Plans
Electrical plans serve several crucial purposes and offer numerous benefits in construction and remodeling projects. Firstly, they provide a detailed roadmap for electricians and contractors, guiding them in installing and placing electrical components, outlets, switches, and wiring. This ensures accuracy, consistency, and adherence to electrical codes and safety standards.
Secondly, electrical plans allow for efficient planning and coordination with other building systems, such as plumbing and HVAC, avoiding conflicts and ensuring harmonious integration.
Additionally, these plans facilitate cost estimates, material procurement, and project scheduling. They also aid in troubleshooting and future maintenance by providing a clear reference for the electrical system layout. Overall, electrical plans streamline the installation process, enhance safety, minimize errors, and contribute to the overall functionality and efficiency of the electrical system.

How to Draft an Electrical Plan With RoomSketcher
RoomSketcher is a powerful and user-friendly software product that allows users to create detailed and accurate electrical drawings. The software offers a wide range of features and tools, including drag-and-drop functionality, 2D and 3D views, and a standard set of symbols and icons for electrical equipment and components.
Here is how you draw your electrical plan with RoomSketcher:
Step 1: Draw Your Floor Plan
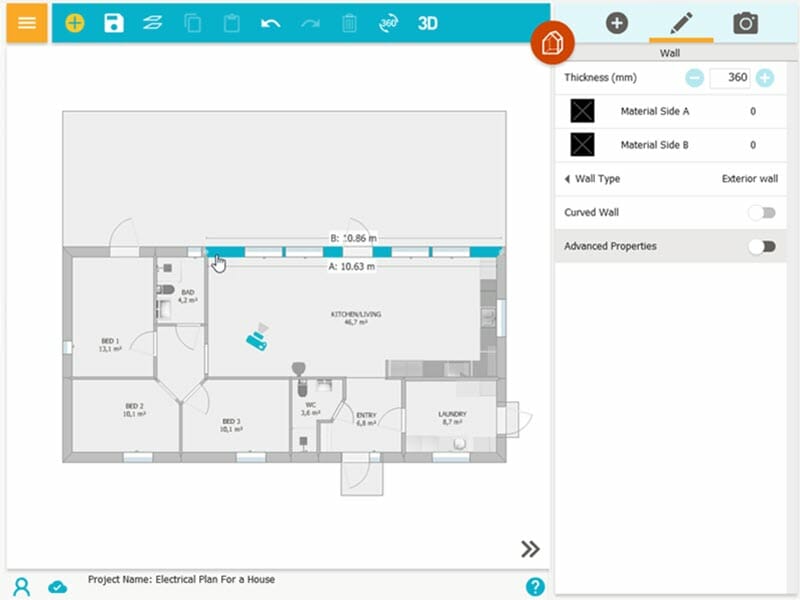
In the RoomSketcher App, upload an existing building's floor plan to trace over, draw a floor plan from scratch, or order a floor plan from our expert illustrators.
With RoomSketcher, you can easily create a detailed and accurate floor plan to serve as the foundation for designing your electrical system. If you are drawing from scratch, start with the walls, then add doors and windows, and make sure to add key fixed installations.
Step 2: Add Electrical Floor Plan Symbols
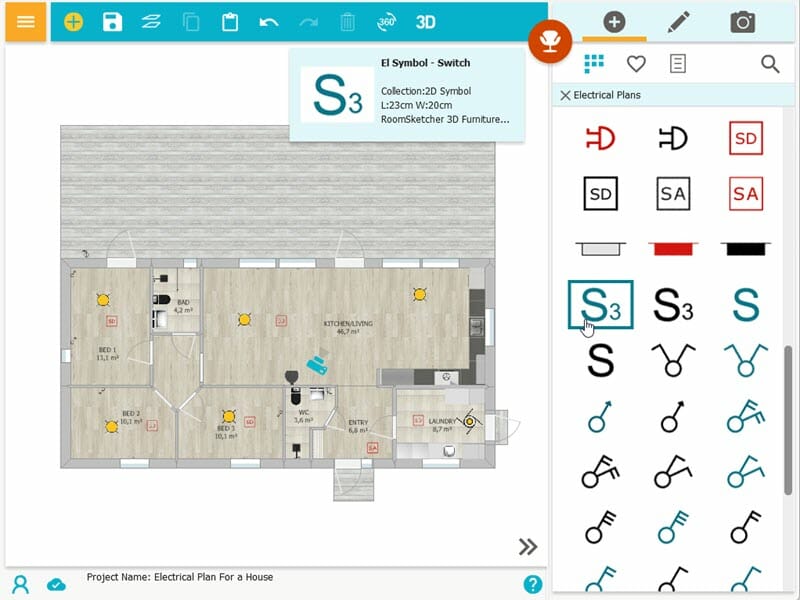
When the basic floor plan is complete, drag and drop electrical symbols onto the layout, including various lighting fixtures, fans, switches, and outlets. RoomSketcher lets you customize each element's size, placement, and orientation.
It's a good idea to add labels and notes for further clarification. In RoomSketcher, you can easily add annotations, symbols, lines, arrows, and labels to create a clear and detailed plan.
Step 3: Print the electrical drawing plan and share it with clients and contractors
Once the electrical plan is complete, it’s just a click to generate a professional 2D Floor Plan that you can export as a PDF, Web Image (JPEG), or print a scaled drawing on your letterhead to include in a client presentation.
Easily share the floor plan with clients and contractors so everyone is on the same page when the installation starts.
How to Read Electrical Drawings
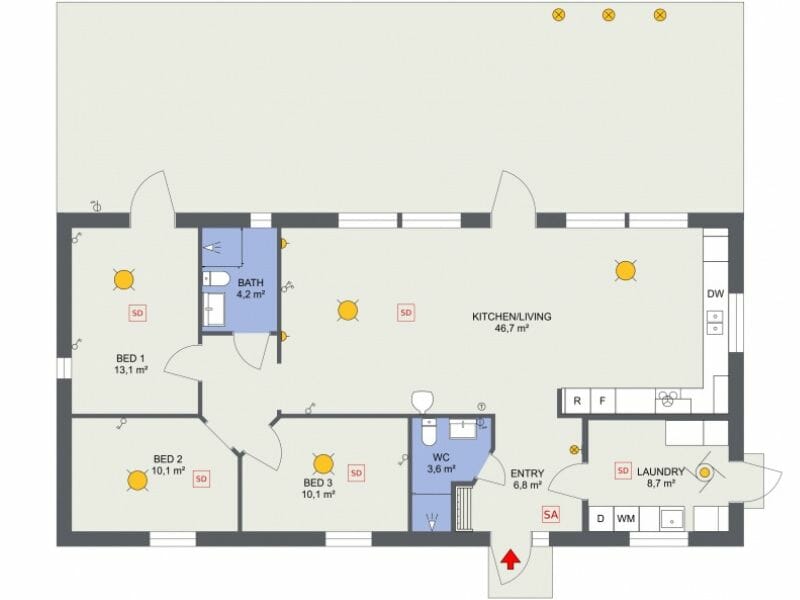
Reading electrical drawings is an essential skill for electricians, engineers, and construction professionals involved in designing, installing, or maintaining electrical systems.
To effectively interpret electrical drawings, it's crucial to understand the symbols, labels, and conventions used. Start by familiarizing yourself with the key components, such as switches, outlets, lights, circuit breakers, and their corresponding symbols.
Pay close attention to the wiring diagrams depicting the connections between various electrical components. Note that different line types, colors, and shading can be used to represent specific types of wires, voltages, or grounding. Understand the circuit numbering and labeling system employed to identify different circuits and panels. Reviewing the legends and notes provided is essential, as they contain vital information about the electrical layout and specifications.
Electrical Plan Templates
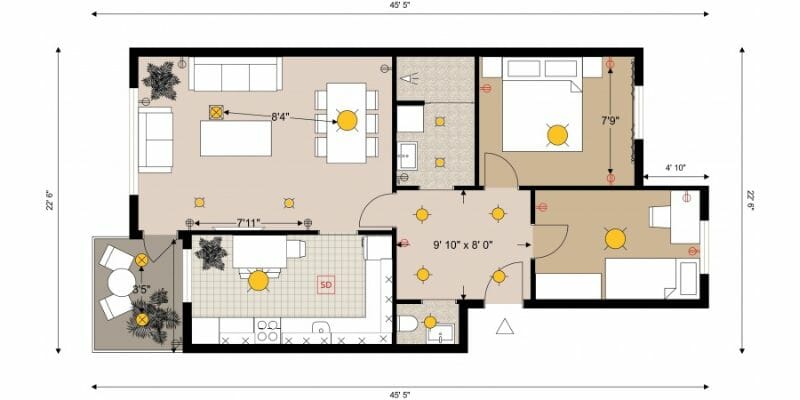
RoomSketcher offers a range of customizable electrical plan templates, allowing users to easily open and edit them to suit their specific needs, ensuring a personalized and tailored electrical plan.
Electrical Plan Symbols
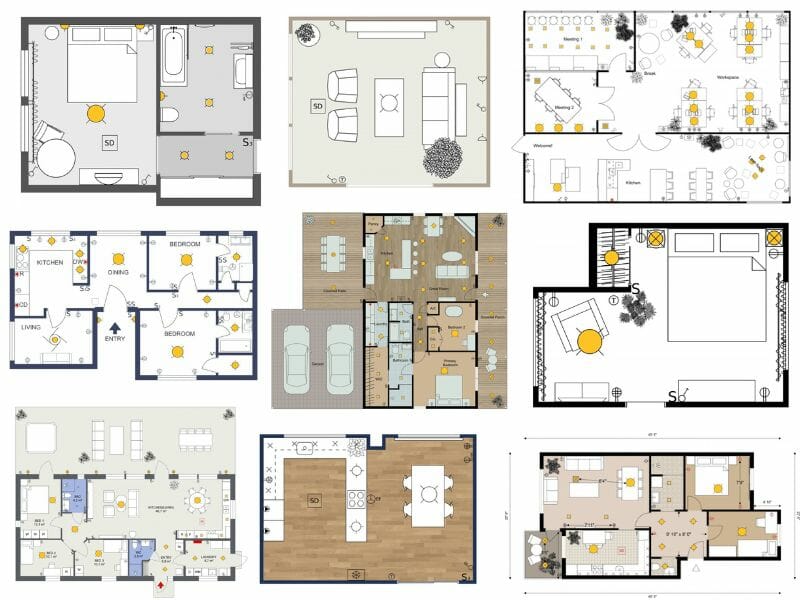
RoomSketcher's product library provides a comprehensive collection of electrical plan symbols, making incorporating accurate representations of various electrical components into your plans easy. The library includes a wide range of symbols for outlets, switches, lighting fixtures, appliances, and other essential elements.
Each symbol is designed to adhere to industry standards, ensuring clear and consistent communication of the electrical features in your plans. With these readily available symbols, you can effortlessly drag and drop the desired elements onto your floor plan, creating a visually informative and professional electrical plan.

Frequently Asked Questions (FAQ)
An electrical plan typically includes details and information about the electrical layout of a building or space. It encompasses placing and arranging electrical fixtures, outlets, switches, lighting, wiring, circuits, and other electrical components.
Additionally, an electrical plan may include symbols and annotations indicating the locations of junction boxes, panels, transformers, and other relevant equipment. The plan serves as a blueprint for electricians and contractors, guiding the installation and implementation of electrical systems within the structure.
Electrical outlets should be strategically placed throughout a building or space to provide convenient access to power where needed. Outlets are commonly positioned along walls, about 12 to 18 inches above the floor level for standard residential installations. They should be evenly distributed throughout each room, ensuring no area is left without a reachable outlet.
Specific placement considerations may include placing outlets near workstations, countertops, or areas where electrical appliances or equipment will be used. Code requirements and local regulations may also dictate minimum outlet spacing and placement in certain areas, such as kitchens, bathrooms, and outdoor spaces, for safety and compliance purposes.
The three main types of electrical floor plans are lighting plans, power plans, and reflected ceiling plans. To achieve desired illumination levels and aesthetics, a lighting plan focuses on the placement and arrangement of lighting fixtures, including recessed lights, pendant lights, and sconces.
A power plan details the location of electrical outlets, switches, and circuitry, ensuring convenient access to power sources throughout the space.
Lastly, a reflected ceiling plan showcases the positioning of lighting fixtures, HVAC vents, and other ceiling-mounted elements, providing a comprehensive view of the ceiling layout and how it integrates with the electrical system. These three types of electrical floor plans work together to create a well-designed and functional electrical system within a building or space.
Need an Electrical Plan App? Try RoomSketcher
From customizing floor plans to incorporating electrical symbols and generating accurate diagrams, RoomSketcher simplifies designing and visualizing electrical systems. Don't settle for guesswork or complex software—try RoomSketcher and transform your electrical planning experience.
Don't forget to share this post!
Recommended Reads

Electrical Plan Examples and Templates to Kick-Start Your Project
Transform your project with electrical plan examples and templates. Streamline your planning process for success. Explore now!
From Simple to Complex: HVAC Plan Examples for Every Project
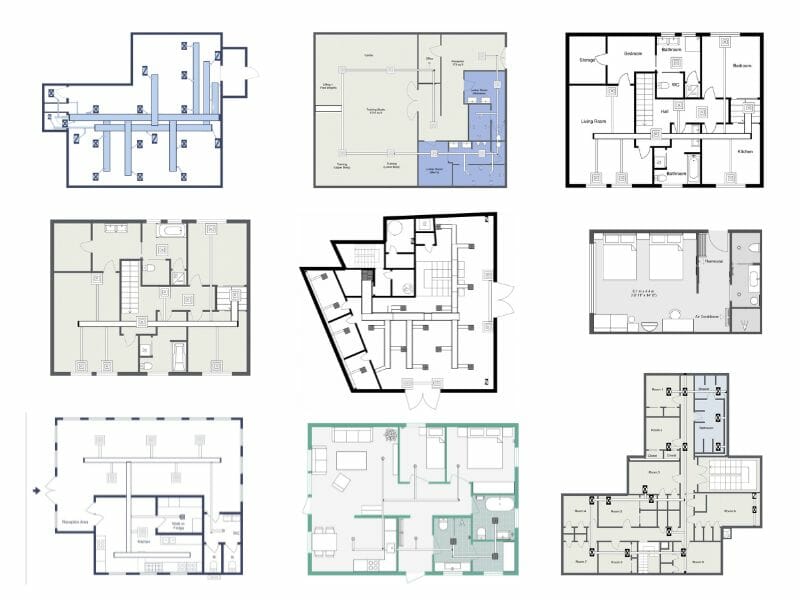
Are you looking to improve the efficiency of your heating, ventilation, and air conditioning (HVAC) system? The key to achieving optimal efficiency lies in designing a well-planned HVAC system that considers your space's unique needs and characteristics
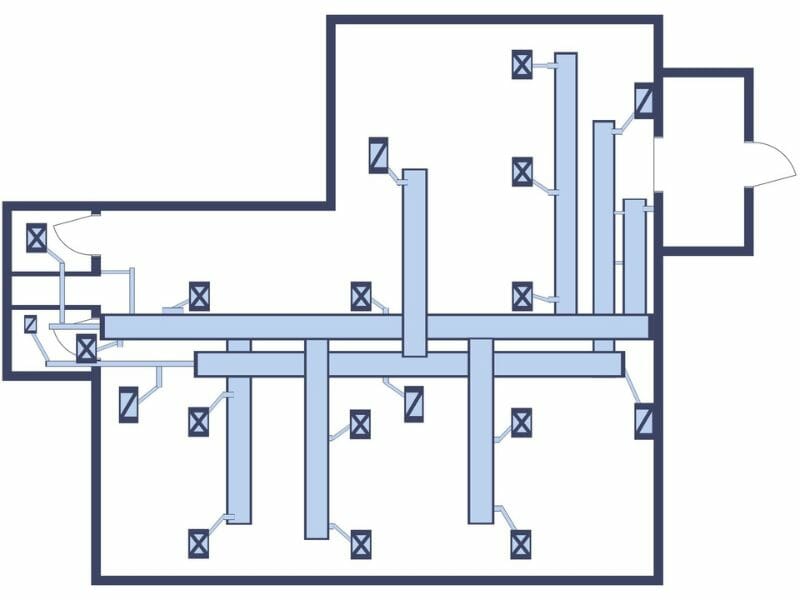
How to Make an HVAC Floor Plan With RoomSketcher
Design your HVAC floor plan easily with RoomSketcher. Learn step-by-step instructions to create an efficient and accurate HVAC design.
